How to Create a Timeline Notebook that Will Grow with Your Kids
There it was. The one wall in our schoolroom where our history timeline was displayed. Figures my kids had colored and pasted throughout the year. And now, now it all had to come down. We were moving and our new house did not have the wall space for even our current study, let alone all of history.
I was not ready to let go of our history timeline. It’s such a great hands-on tool when it comes to teaching history. It also allows my kids to see where everything falls, even when we jump around.
Enter a history timeline notebook.
Disclaimer: This post is sponsored by Home School in the Woods. I was compensated for my time and honest opinion. This post may contain affiliate links.
What is a Timeline Notebook for History?
A timeline notebook is similar to a timeline wall for history, the biggest difference is it’s kept in a binder. The second is they tend to be individual, whereas a wall timeline would be more for the whole family. It is slightly different than a Book of Centuries, but not by much. In a Book of Centuries, each page covers 500 years so a two-page spread covers a century. Hence the name. With a timeline notebook, you may have less than 500 years on a page, especially for recent history.
The best part about a history timeline notebook is that it can grow with your child. I don’t know about you, but we don’t cover all of history from beginning to now every year. We take it in sections. With the timeline notebook, your child can continue adding to it every year. They can even go back and add in new events as they learn more about that specific time period.
When they graduate, it is a great keepsake of all the effort they put in and the things they learned.
Creating Your History Timeline Notebook
Because the goal of a timeline notebook is for it to grow with your child, it’s important to create it so that it will last.
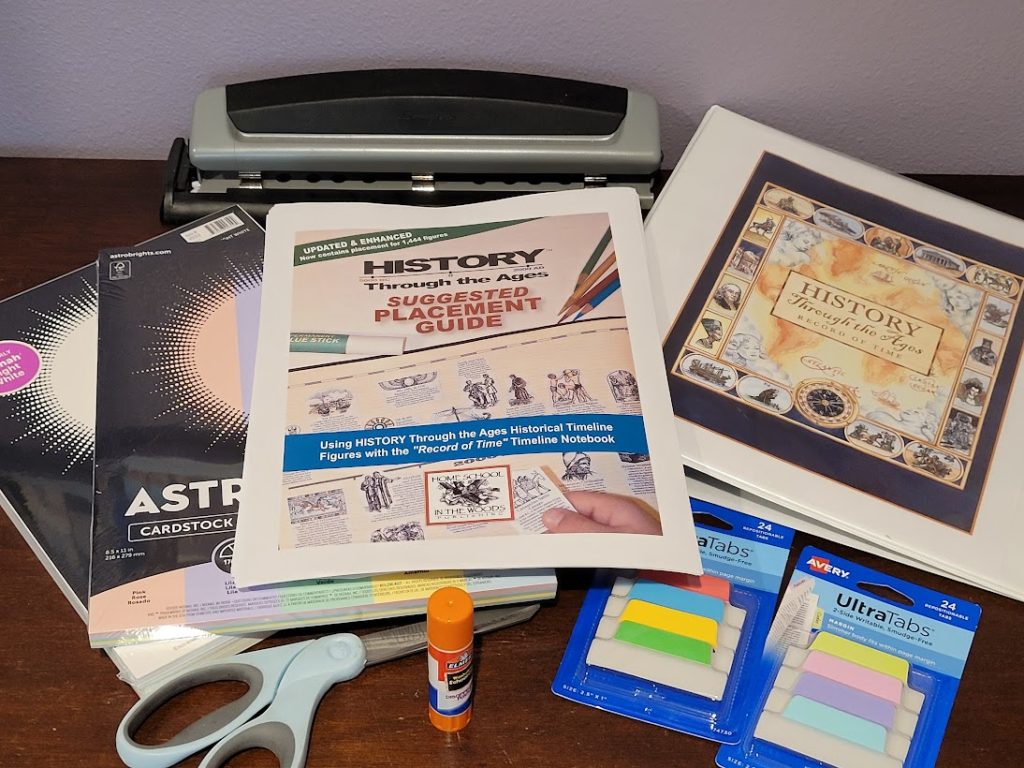
The supplies I recommend are:
- 1 1/2″ binder with a clear front pocket to insert a cover
- 3-hole punch
- cardstock–(I use different colors to represent different time periods and white for the timeline figures)
- file folder tabs
- Blank timeline sheets and figures (I like these from Home School in the Woods)
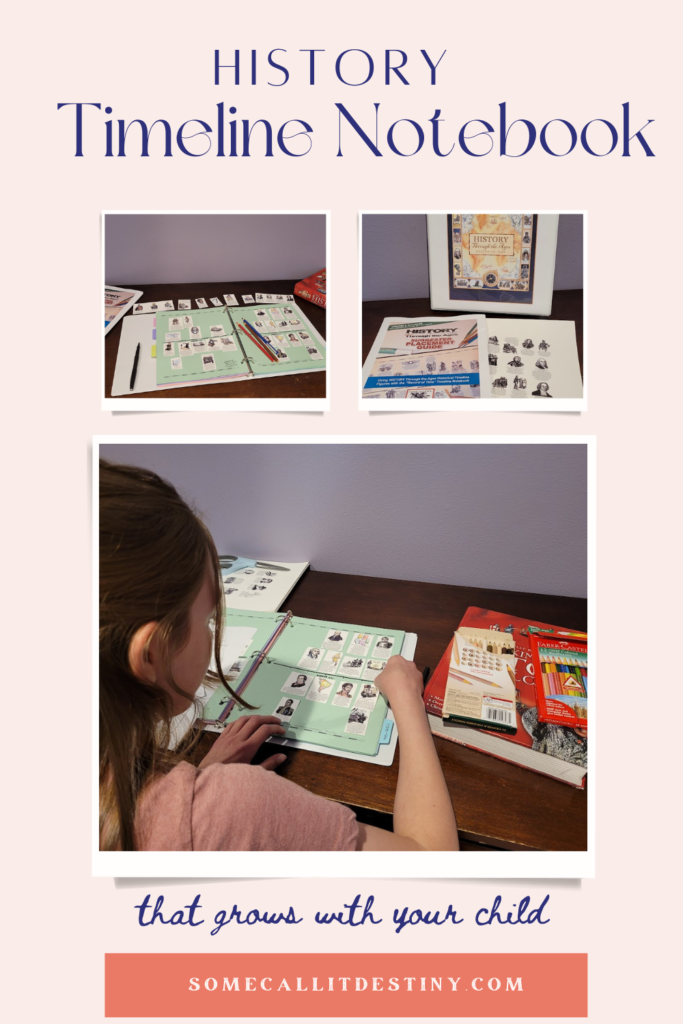
Assembling Your Timeline Notebook
It is important when assembling your timeline notebook that you use cardstock and not regular printer paper. Cardstock is more durable and will better withstand having the pages turned repeatedly over the years. I recommend using 65lb paper or heavier.
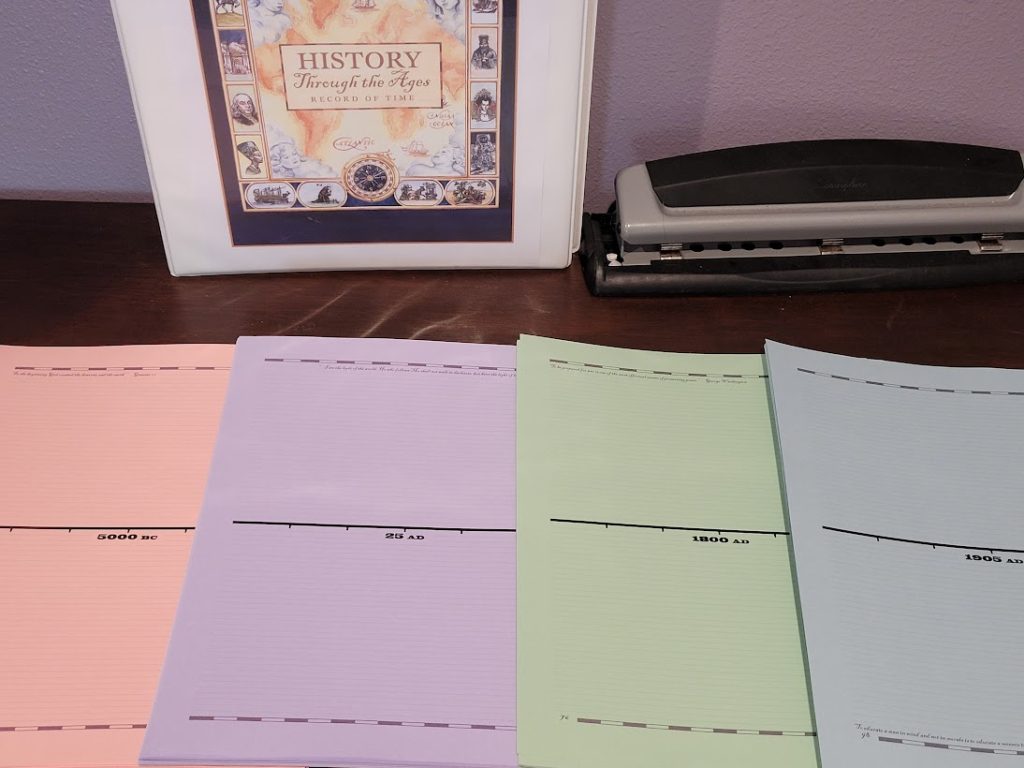
I use four different colors to break down historical periods. This also helps to locate dates faster. You can use any four colors you like. I chose pastels because they still allow the timeline to show clearly.
If you don’t want to use different colors, that’s okay. I would still recommend using a cream or manilla-colored cardstock so the timeline figures stand out more.
Printing Your Timeline Sheets
The first step is to print your timeline sheets onto the cardstock. I use the sheets that come in the Printable Essential Timeline Library from Home School in the Woods. I like that they have an index of what pages each year starts on, so I can easily print different years on different colored cardstock.
They also have the option of printing a horizontal or vertical timeline. We chose to use a vertical timeline.
You will want to print your timeline pages double-sided. This is another reason why cardstock is best.
Preparing Your Timeline Notebook
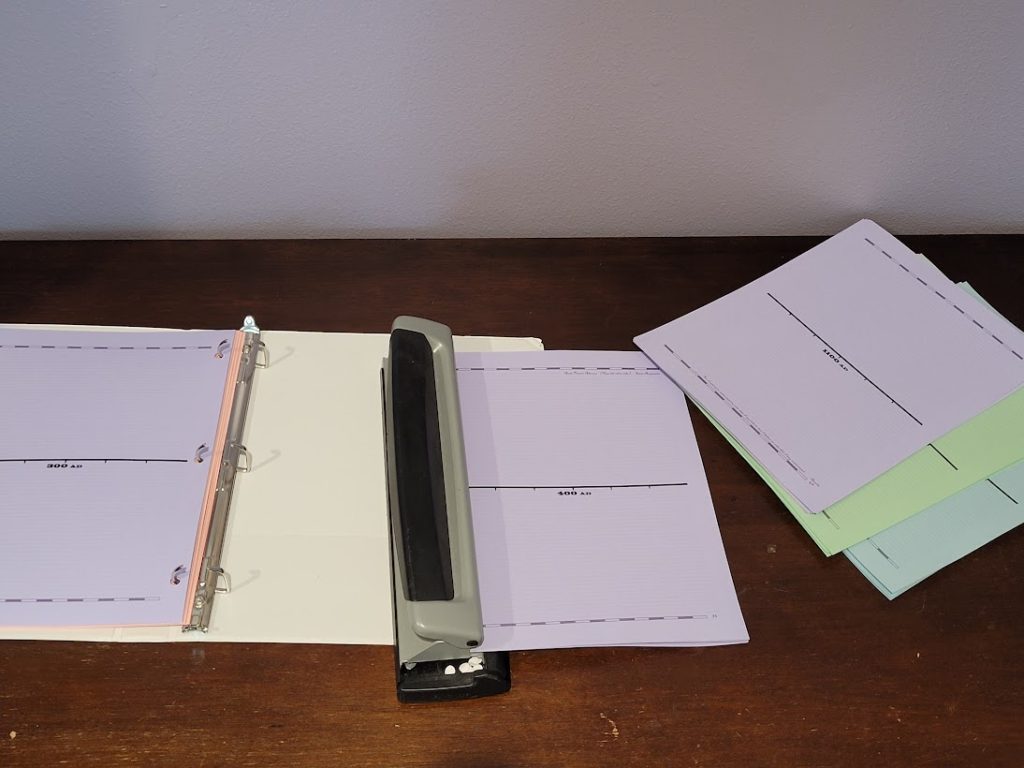
Once your timeline sheets are printed, then it’s time to three-hole punch them and place them in the three-ring binder.
Because I wanted my timeline printed back-to-back, some time periods begin on the back of another, so that first set of years is a different color, but that’s okay.
After your timeline pages are all in the notebook, then write your time periods on the file tabs and place them on the first sheet of each period.
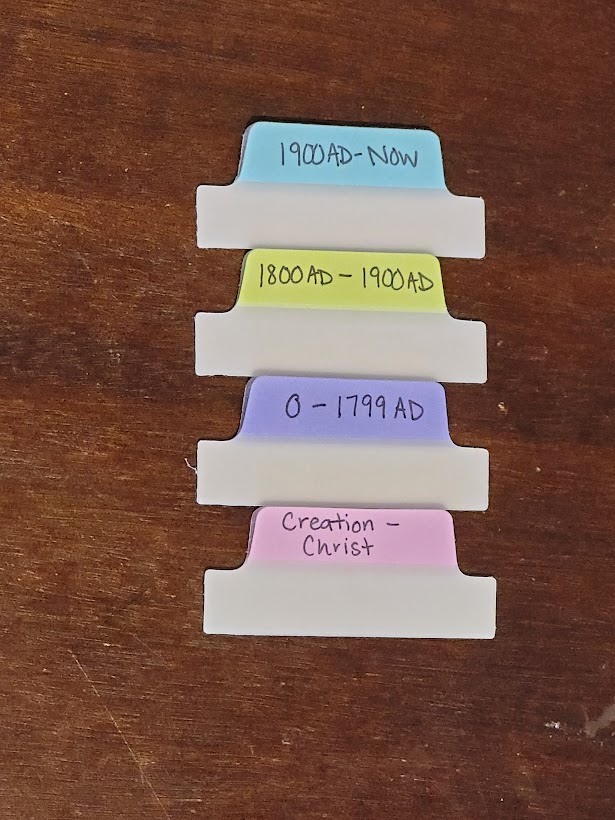
The four periods I chose to break our timeline notebook into were:
- Creation to Christ (5000 BC – 0)
- 0-1799 AD
- 1800 AD- 1900 AD
- 1900 AD- Now
I chose file tabs that peel and stick. They can easily be removed later on to replace or get rid of if desired.
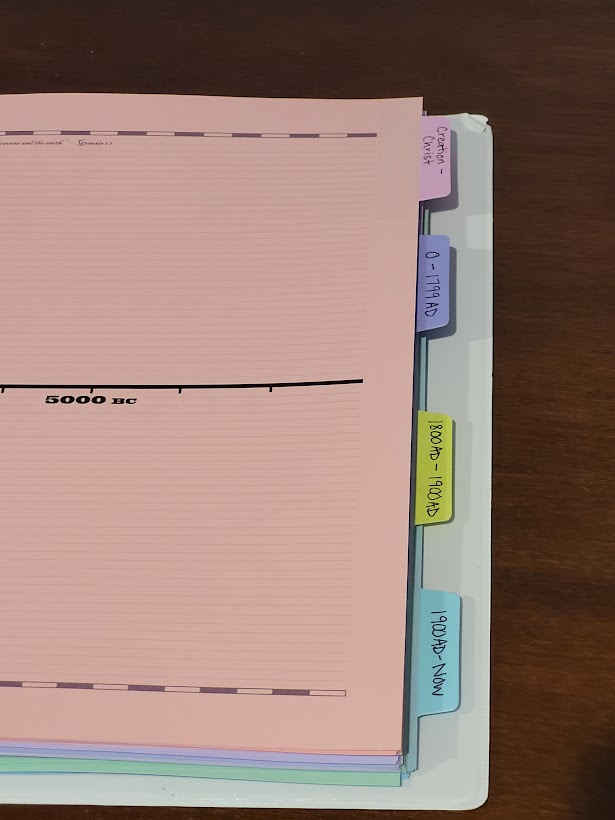
In addition to the different colored card stock, the file tabs make the organization of your timeline notebook more seamless. Being able to find the correct time period more quickly will save on wear and time.
Related| Explore the Middle Ages with Project Passport from Homeschool in the Woods
Begin Using Your Timeline Notebook to Teach History
Once your history timeline notebook is assembled, then the real fun begins! In the Printable Essentials Timeline Library, you also get 1,444 timeline figures that span from the creation to now. It’s basically every timeline figure Home School in the Woods has included in one place. We really like their timeline figures. You have the option of printing with or without descriptive text. And, they give you a Suggested Placement Guide, which is super helpful.
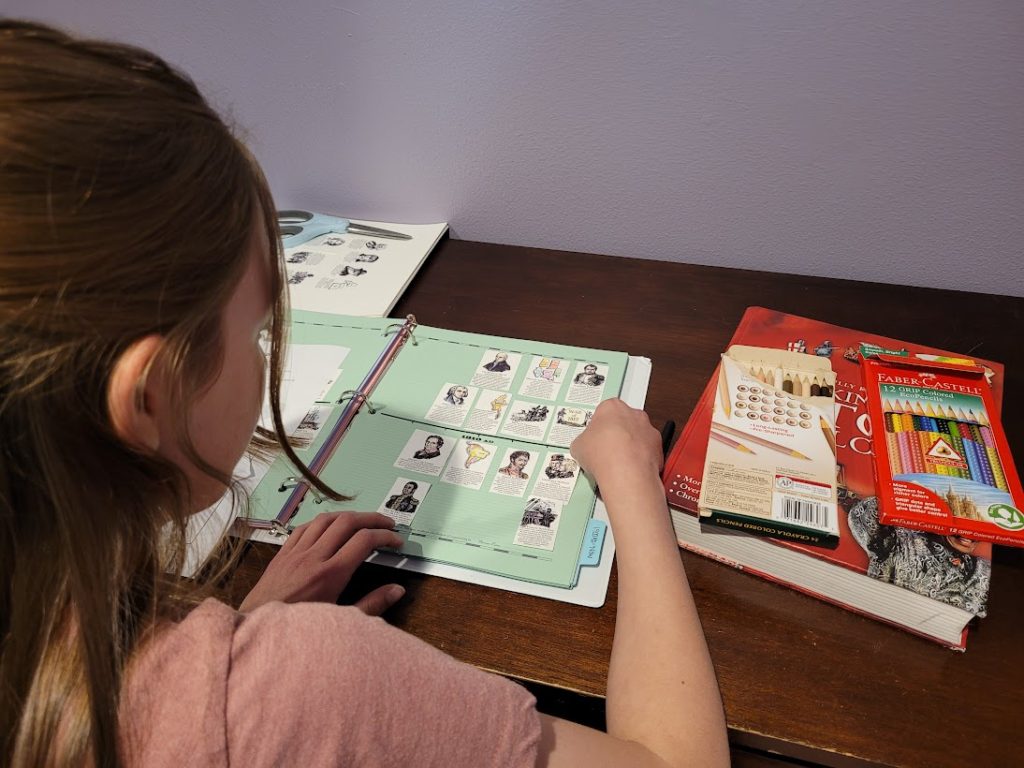
I recommend printing the historical timeline figures on white cardstock. This will keep the pictures from bubbling after you glue them to the page.
When gluing them down, use a glue stick and not liquid glue. Another option would be to print them on sticker paper and then just peel and stick.
To continue to keep your timeline notebook durable as you add historical figures, I recommend using colored pencils for the timeline figures. We use the Colors of the World pack from Crayola for the people and another set of colored pencils for details and events.
Related| How We Use Time Travelers WWII History from Home School In the Woods
Teaching History Using a Timeline Notebook
A timeline notebook is a great accompaniment to teaching history in your homeschool. There are so many different ways to use timelines to teach history.
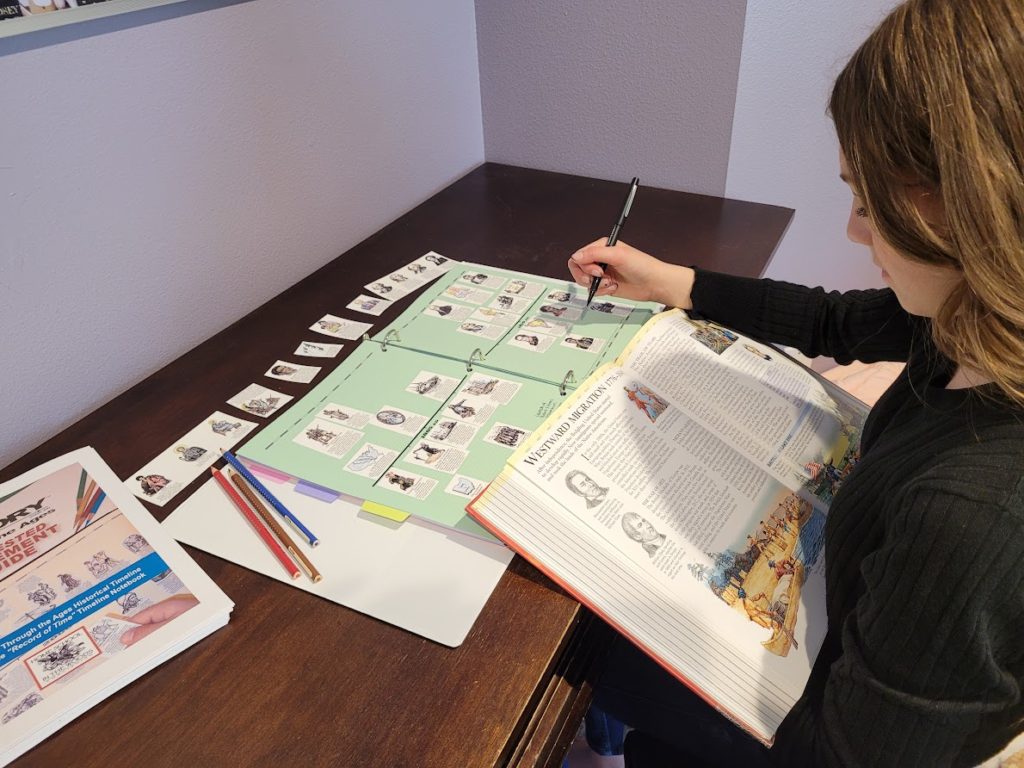
One way we incorporate historical timelines is by having kids place the timeline figures for that period on the page. We use the figures with text, so there’s already a little explanation. Next, we look up the time period in The Kingfisher History Encyclopedia and read about the events that took place. I have them add any additional events they want to their timeline from what they read. Many times, this also allows them to see how the events are interconnected.
More importantly, it makes it their timeline. Unique especially to them. These are the events or people who stand out to them for whatever reason they have chosen. And as they look back over it, they will remember.
Then I have my kids pick a person or event from the timeline to learn more about. This person or event will get a more in-depth study. Sometimes, they will pick multiple people or events. It just depends on the era.
Most importantly, it gives them an overall visual of how things unfolded in history.
We love using history timelines in our homeschool.
Home School in the Woods Coupon Code
Use this coupon code from Home School in the Woods to get the Printable Essentials Timeline Library for your own Timeline Notebook.